


Desktop client
Your users open their desktops with the Luvio desktop client. This page explains how to install it on their computers, how to deploy it to many computers, and what the user sees the first time.
Before you begin
Section titled “Before you begin”- Each user has a Luvio account with access to a pool (First setup and Templates, agent and pools).
- The users’ computers reach the Luvio server (TCP 3080 or 3443) and the virtual desktops directly (TCP 8081 and UDP 4433): see Network flows. From outside your network, they connect through your VPN.
- You know the address your users type:
http://<server>:3080, orhttps://<server>:3443when HTTPS is on (the default of the .deb or .rpm package).
Install the client
Section titled “Install the client”Download the installer of the users’ system from <DOWNLOAD_URL>:
| System | File | Notes |
|---|---|---|
| Windows 10 and 11, x86-64 | Luvio-Client-Setup-x64-<version>.exe |
Needs the Microsoft Edge WebView2 runtime, present on Windows 11 and on up-to-date Windows 10 |
| macOS 14 Sonoma and later, Apple silicon and Intel | Luvio-Client-macos-universal-<version>.dmg |
Not signed with an Apple Developer ID yet: macOS asks to allow it once |
| Ubuntu 24.04 and 26.04, Debian 13 (x86-64) | luvio-client_<version>_amd64.deb |
The client is in English, French, Spanish or German, as the language of the system; in English on a system in another language.
Windows. Run the installer and follow its steps. Its screens are in English, French, Spanish or
German, as the display language of Windows; on a Windows displayed in another language, it first
asks which of the four to use, with English selected. An upgrade keeps the language of the installed
version. It installs Luvio Client in C:\Program Files\Luvio-Client and adds it to the Start menu.
It needs administrator rights.
macOS. Open the disk image and drag Luvio Client onto Applications. The client is not signed with an Apple Developer ID yet, so macOS refuses to open it the first time. Allow it once. On macOS 15 and later (the labels below are those of macOS 26.5):
- Open Luvio Client from Applications. macOS says “Luvio Client” Not Opened: click Done.
- Open System Settings > Privacy & Security. Under Security, next to “Luvio Client” was blocked to protect your Mac, click Open Anyway. macOS asks Open “Luvio Client”?: click Open Anyway again, then enter the name and password of an administrator of the Mac.
On macOS 14, Control-click Luvio Client in Applications, choose Open, then Open again in the dialog that follows.
The client opens, and from then on opens like any other application. On macOS 26.5, allowing it takes an administrator’s name and password: a user who does not have them asks an administrator, or the administrator installs the client for them as in Deploy to many computers. If the server or the desktops are on the Mac’s own local network, macOS also asks once whether Luvio Client may find and connect to devices on your local network: click Allow, the client cannot reach them otherwise.
Ubuntu or Debian. Install the package: apt installs the libraries it needs with it.
sudo apt install ./luvio-client_<version>_amd64.debThen start it with luvio-client in a terminal: the package adds no entry to the applications menu
yet.
Deploy to many computers
Section titled “Deploy to many computers”The Windows installer runs silently, for example from your software deployment tool:
Luvio-Client-Setup-x64-<version>.exe /VERYSILENT /SUPPRESSMSGBOXES /NORESTARTA silent installation never asks for the language: it is the display language of Windows when it is
French, Spanish or German, English otherwise, and an upgrade keeps the language of the installed
version. To choose it, add /LANG=english, /LANG=french, /LANG=spanish or /LANG=german. The
uninstaller keeps the language of the installation.
On macOS, copy the application from the disk image, for example from a script your device management tool runs as root:
mnt=$(mktemp -d)hdiutil attach -nobrowse -readonly -mountpoint "$mnt" Luvio-Client-macos-universal-<version>.dmgrm -rf "/Applications/Luvio Client.app"ditto "$mnt/Luvio Client.app" "/Applications/Luvio Client.app"hdiutil detach "$mnt" && rmdir "$mnt"xattr -dr com.apple.quarantine "/Applications/Luvio Client.app"The script replaces an earlier version rather than copying over it: ditto alone would keep the
files the new version no longer has, and macOS would then refuse the app’s signature. The last line
removes the mark that a browser download leaves on the files and that makes macOS ask for
Open Anyway: users then open the client without that step. macOS still asks each
user for the local network access, which a device management profile cannot grant.
To give your users the server already configured, deploy the client’s settings file to each user profile:
| System | Settings file |
|---|---|
| Windows | %APPDATA%\Luvio\Luvio-Client\config\config.toml |
| macOS | ~/Library/Application Support/io.Luvio.Luvio-Client/config.toml |
| Linux | ~/.config/luvio-client/config.toml |
With this content (one [[servers]] block per server):
[[servers]]host = "http://luvio.example.com:3080"label = "Company desktops"kind = "control_server"Write the address the way the users would type it: http:// for an HTTP server; without a scheme,
the client uses HTTPS.
Uninstall on Windows
Section titled “Uninstall on Windows”Uninstall Luvio-Client from Settings > Apps. If the client is open, the uninstaller asks
to close it first. When the account that runs the uninstaller has client settings (its servers,
trusted certificates and preferences), the uninstaller then offers to delete them too: tick Delete
these settings too. Otherwise they stay, in %APPDATA%\Luvio\Luvio-Client and
%LOCALAPPDATA%\io.luvio.client of each user profile. With a roaming profile or a redirected
%APPDATA%, the first folder follows the user to all their computers: deleting it deletes it on all
of them.
To uninstall silently:
"C:\Program Files\Luvio-Client\unins000.exe" /VERYSILENT /SUPPRESSMSGBOXES /NORESTARTAdd /DELETEUSERDATA to delete the settings too, only those of the account that runs the
uninstaller: run by a deployment tool as SYSTEM, it deletes none of the users’ settings. A silent
uninstall does not wait for the client: close it first, or the files it uses stay.
Uninstall on macOS
Section titled “Uninstall on macOS”Quit Luvio Client and move it from Applications to the Trash. Its settings stay in the user’s account, with the servers and the certificates the user trusted, and a reinstalled client finds them again. To remove them too, run as that user:
rm -rf ~/Library/"Application Support"/io.Luvio.Luvio-Client ~/Library/WebKit/io.luvio.client ~/Library/Caches/io.luvio.clientFirst connection
Section titled “First connection”-
Open Luvio Client and click Add server.
-
Give the server a Server name (any name, for example
Company desktops) and its Server address:http://<server>:3080, orhttps://<server>:3443with HTTPS. Withouthttp://, the client uses HTTPS. Click Save.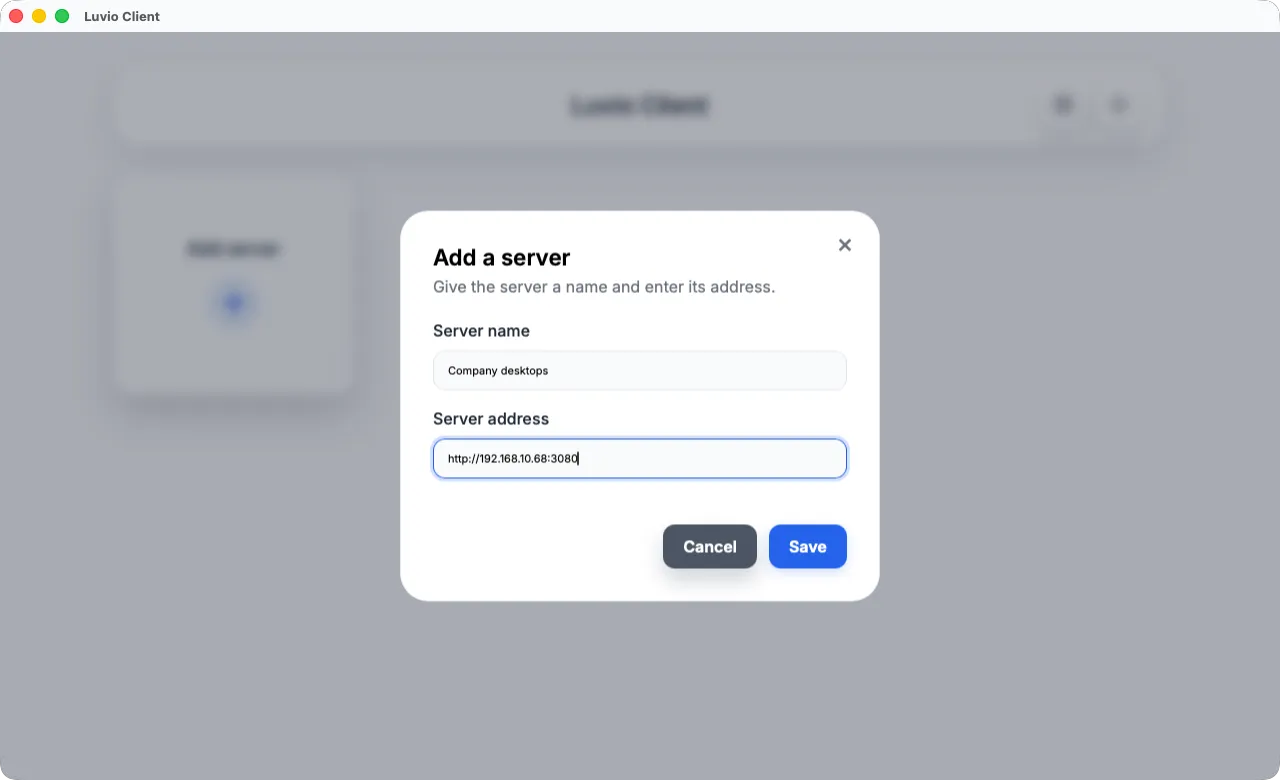
-
Click the server. With HTTPS and the self-signed certificate of Luvio, the client shows Check this server before connecting with the fingerprint of the certificate. Compare it with the one your administrator gives you, then click Trust this server. The client remembers it.
-
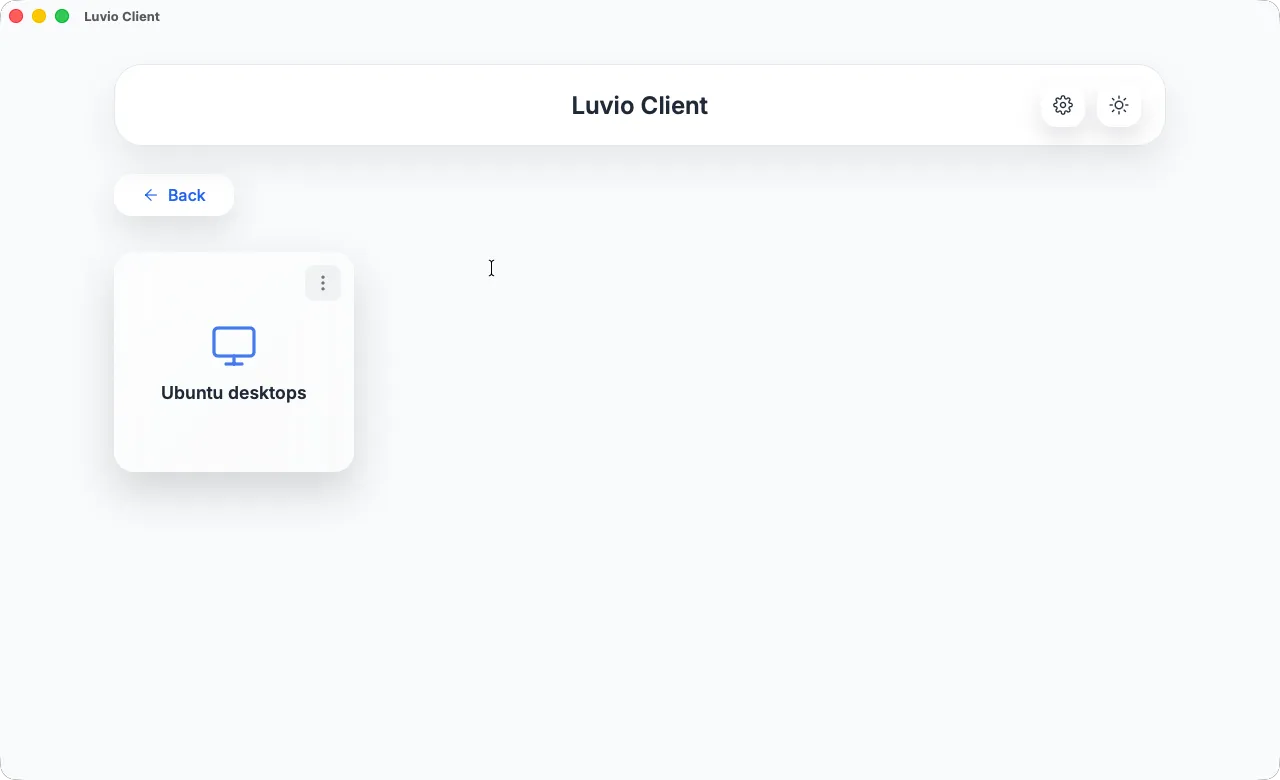
Sign in with your Username and Password (your Luvio or directory account), then Sign in. With a single sign-on account, click Sign in with your identity provider instead: your browser opens on its sign-in page; once you are signed in, it says “Signed in. You can close this tab and return to the Luvio client.” The client lists your pools.
-
Click a pool. The desktop opens in a Remote desktop window. If the desktop shows its sign-in screen, a Sign in to your session window asks for the account of the desktop’s system (for Windows,
DOMAIN\useroruser@domain.example).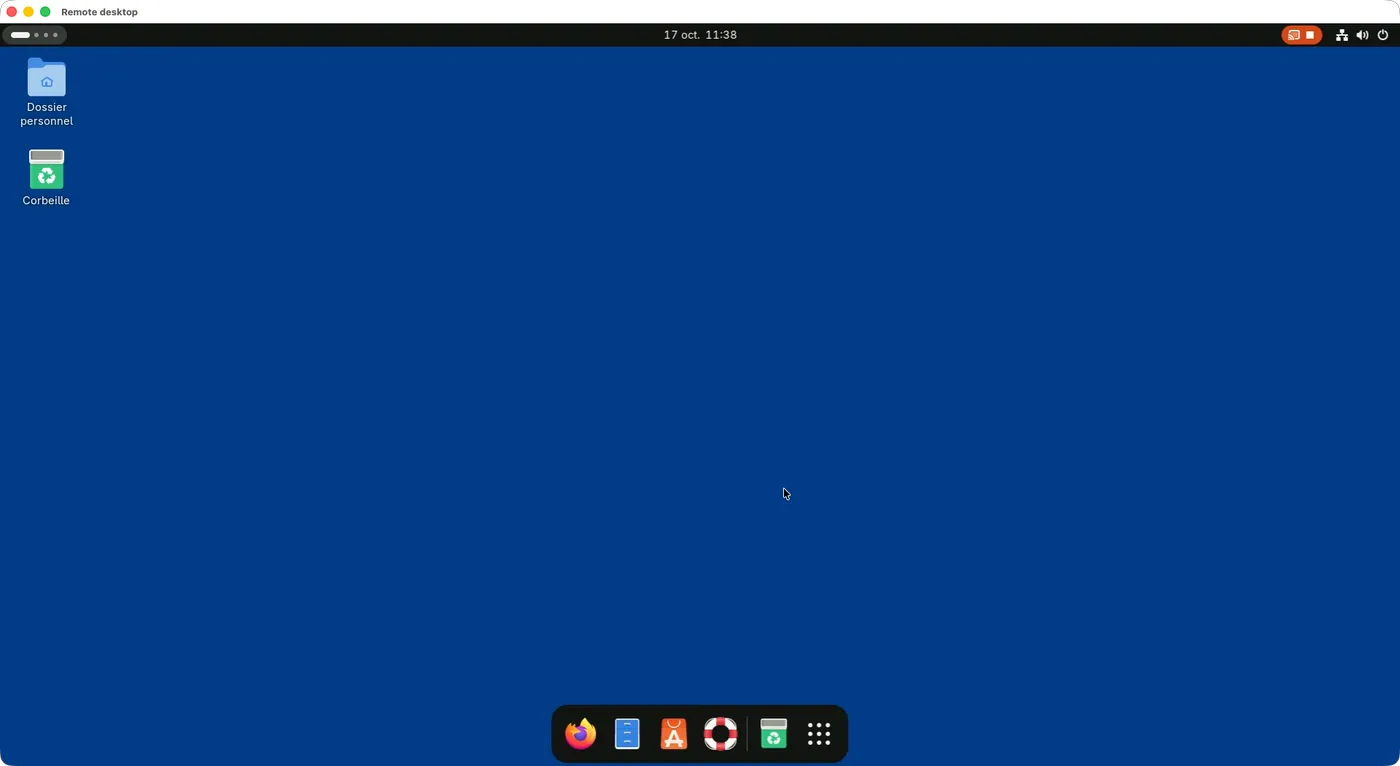
To leave, close the Remote desktop window. On a Lightning Clone pool, the client asks whether to keep the machine reserved for a while (Keep my machine active) or to release it (Disconnect immediately).
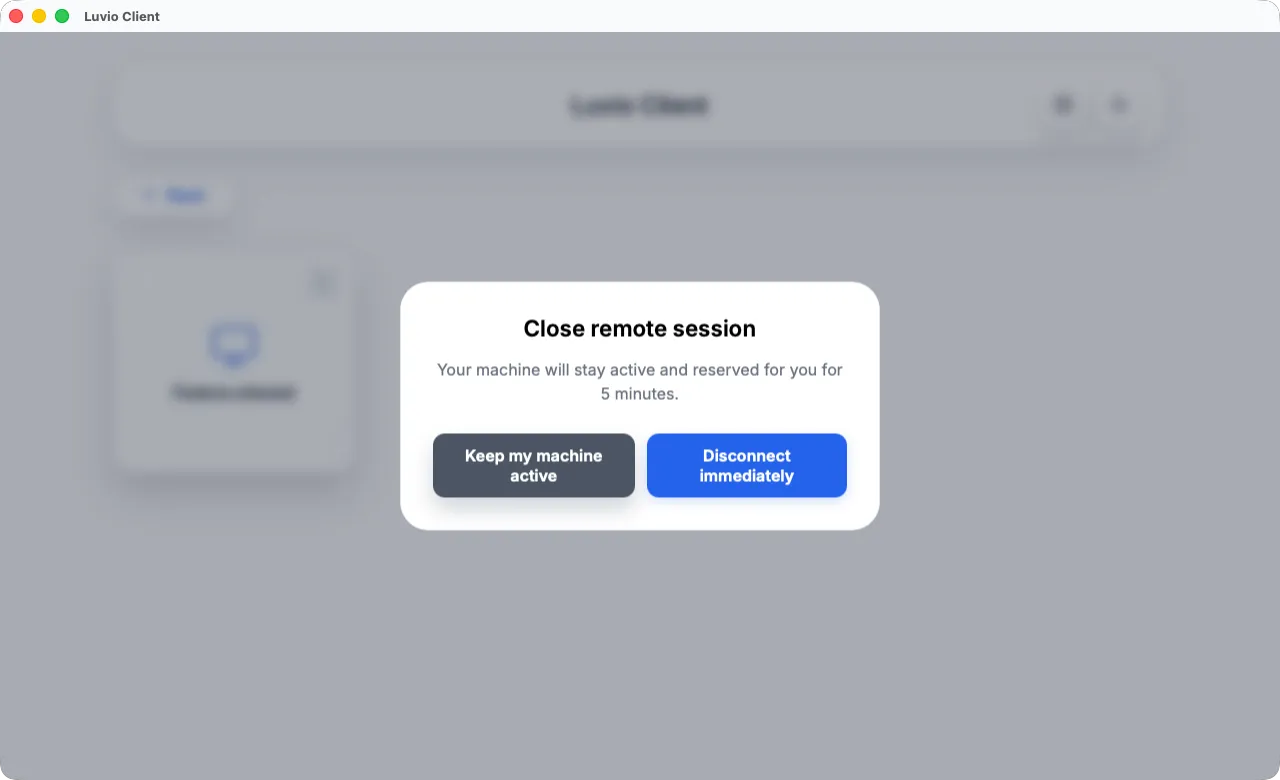
The question is about your session on the machine, so it is not asked when there is none. If you close the Remote desktop or Sign in to your session window before anyone signed in to the machine, the client releases it at once: Windows and Linux alike. Nobody used the machine, so the server does not delete it but puts it back in the pool, ready for the next user. When the client cannot tell (the machine’s agent is too old to report it, the server did not report the machine at the sign-in screen, a sign-in was sent to that machine, even from an earlier window of the client, or the machine reports one under way), it asks.
For the administrator: the certificate fingerprint. Users compare the fingerprint the client shows with yours. Read it from the server, for example:
openssl s_client -connect <server>:3443 </dev/null 2>/dev/null | openssl x509 -noout -fingerprint -sha256Troubleshooting
Section titled “Troubleshooting”| Message or symptom | Cause and fix |
|---|---|
| “This server does not answer over HTTPS. If it uses HTTP, enter its address as …” | The server serves HTTP: type the address with http://. |
| “No pool available” | The account has no access to a pool: grant it in the pool’s Settings > Access. |
| “No machine available” | Every desktop of the pool is in use, or none is ready: check the pool in Manage Machines. A desktop assigned to a user is given to that user only, so a user with no desktop of their own gets this message once the unassigned ones are taken: assign them one. A desktop stays with the account connected to it until its client disconnects, even while it shows the sign-in screen; a desktop left by a client that was killed comes back when its user connects and disconnects again. |
| “Invalid credentials.” with a directory account | The server does not find the account in the directory or the password does not bind: check the directory settings and that the account signs in to the web console. A user the directory synchronisation has not imported yet signs in only when Allow just-in-time login is on. |
| “This account may not open desktops.” | The account lacks the Connect to assigned pools permission: a directory account gets it from the Default group for synced users, or from another of its groups. |
| No Sign in with … button | The server has no enabled OpenID Connect or SAML provider (User Management > Settings > Authentication & Identity), or it is older than the client. |
| The browser does not open the identity provider’s page, or shows a certificate warning | The user’s computer must reach the Luvio server at the address the client uses, and the identity provider. With the self-signed certificate of Luvio, the browser warns as for the web console. |
| “Single sign-on failed (…).” | The identity provider or the server refused the sign-in; the reason in brackets is the one the web console shows at /login?error=... (for example oidc_failed: check the provider’s settings). |
| “This user name belongs to another Luvio account.” | A local, directory or other single sign-on account already has this user name: Luvio never merges them. |
| “The sign-in in the browser took too long.” | The browser sign-in was not finished within 5 minutes: click the button again. |
| The browser shows “Sign-in request expired” | The confirmation page was left open more than 5 minutes, or was already answered: click Sign in with … again in the client. |
| The browser asks “Sign in to the Luvio desktop client as …?” when the user started nothing | Click Cancel: a link opened the sign-in of somebody else’s client. Report the link to the administrator. |
| The client signs in, but the desktop does not open | The computer does not reach the desktop on TCP 8081 or UDP 4433 (firewall, VPN routes). |
| macOS: the client does not open the first time (“Luvio Client” Not Opened on macOS 15 and later) | The client is not signed with an Apple Developer ID yet: allow it once (Install the client). |
| macOS: the client does not reach a server or a desktop of the Mac’s local network, other computers do | The local network access was refused: turn Luvio Client on in System Settings > Privacy & Security > Local Network. |
| The certificate of this server has changed | The server’s certificate is not the one the user trusted. Check with your administrator before trusting the new one. |