


First setup
Once the server is installed (.deb or .rpm, Docker or Kubernetes), the first visit to the web console opens a short setup wizard. It connects Luvio to your hypervisor and creates the administrator account. This page also sets the address the virtual machines use to reach Luvio, and creates the accounts of your users.
It takes about ten minutes. Have at hand:
- the address of your hypervisor and an account on it (see step 4), unless you only use physical machines;
- the password you will give to Luvio’s
adminaccount.
1. Open the web console
Section titled “1. Open the web console”In a browser, open the address of your installation:
| Installation | Address |
|---|---|
| .deb or .rpm package | http://<server>:3080 (or https://<server>:3443) |
| Docker | http://<docker host>:3080 |
| Kubernetes | The address printed by helm install (see Kubernetes) |
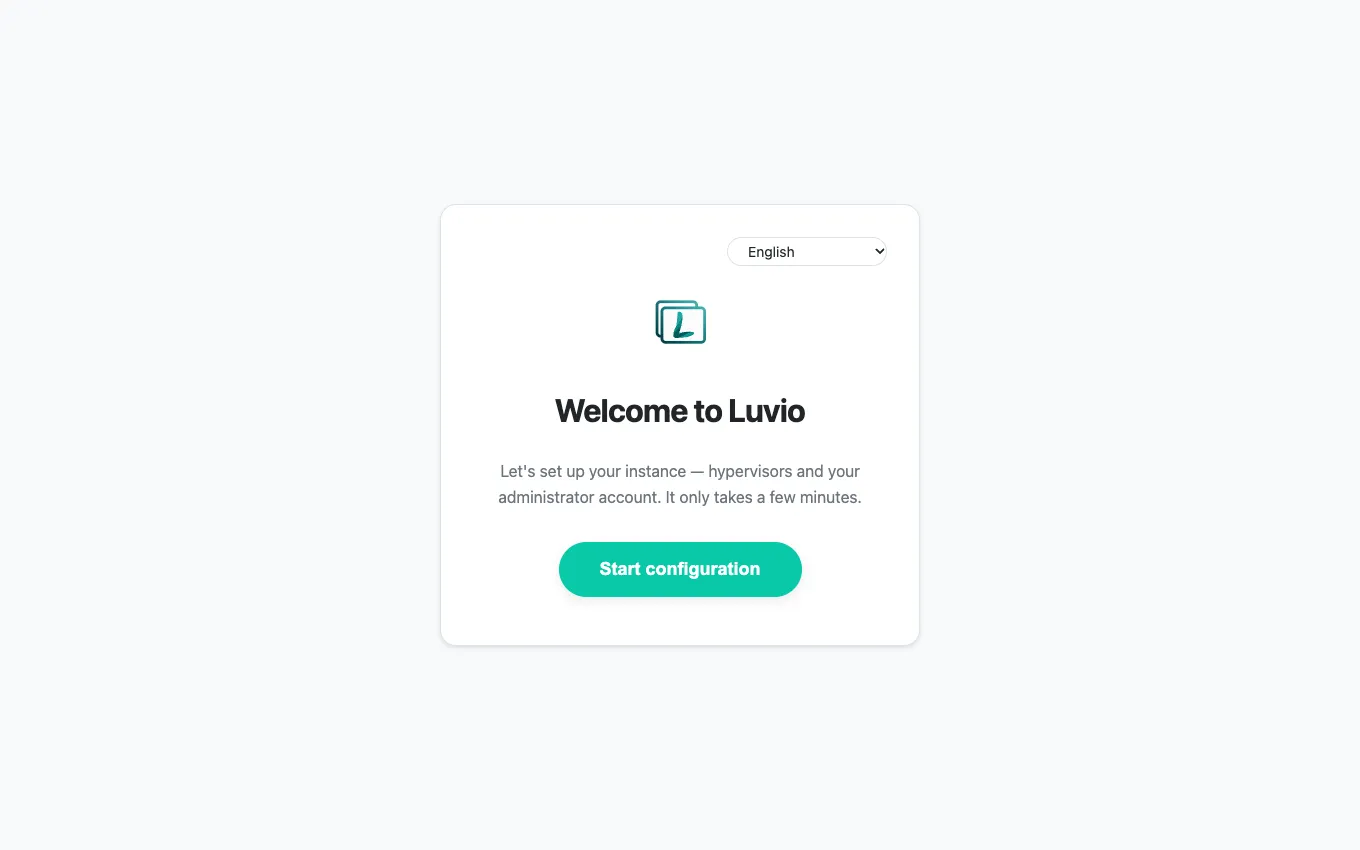
The Welcome to Luvio page appears. Choose your language at the top if needed, then click Start configuration.
2. Choose the installation type
Section titled “2. Choose the installation type”With your own PostgreSQL server, the wizard first asks for the installation type. Click New Luvio installation, then Next.
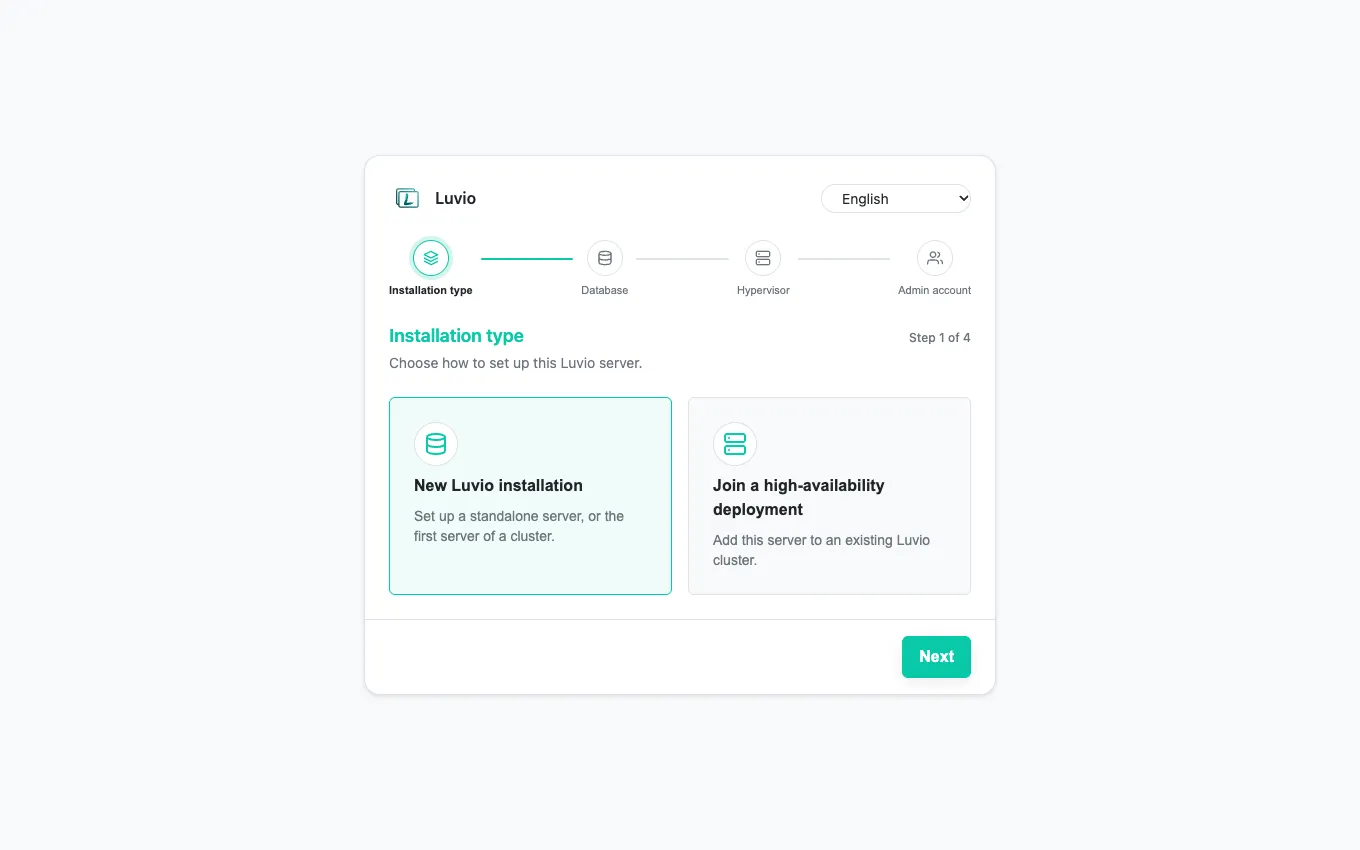
Join a high-availability deployment adds a server to the cluster of the standalone Docker image, a lab mode that this guide does not cover. To run several servers, see High availability.
With the .deb or .rpm package, Luvio has created its own database already: the wizard skips this step and opens on the database. With Docker Compose and Kubernetes, Luvio has built its database at its first start: the wizard skips this step and the next one, and opens on the hypervisor (step 4).
3. Database
Section titled “3. Database”What you see depends on the installation:
-
.deb or .rpm package: Luvio runs its own database, ready. Keep Built-in database (recommended) and click Next.
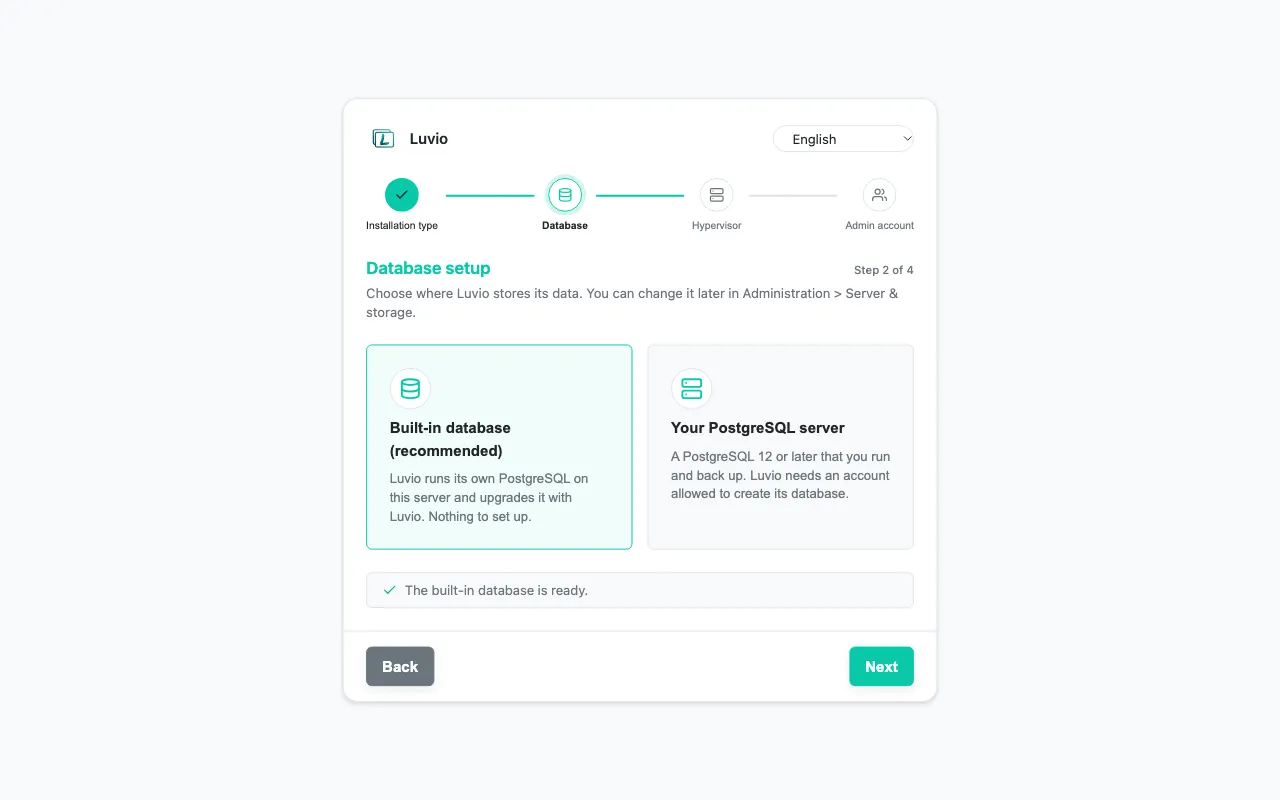
To store the data in your own PostgreSQL server instead, choose Your PostgreSQL server and click Restart with this database. Luvio restarts, in up to a minute, and the page reloads by itself. Choose the installation type again, then fill in the connection as below. Before you save a connection, Built-in database brings Luvio’s own database back the same way.
-
Docker Compose or Kubernetes: the connection to the database comes from the installation, and Luvio builds the database at its first start. You see this step only when it could not: the page shows the connection read-only with the note “The database connection is configured through environment variables and cannot be edited here.” Check that PostgreSQL answers and that the account has the
CREATEDBright (or owns the database), then click Next: Luvio creates its tables and says “Database built successfully”.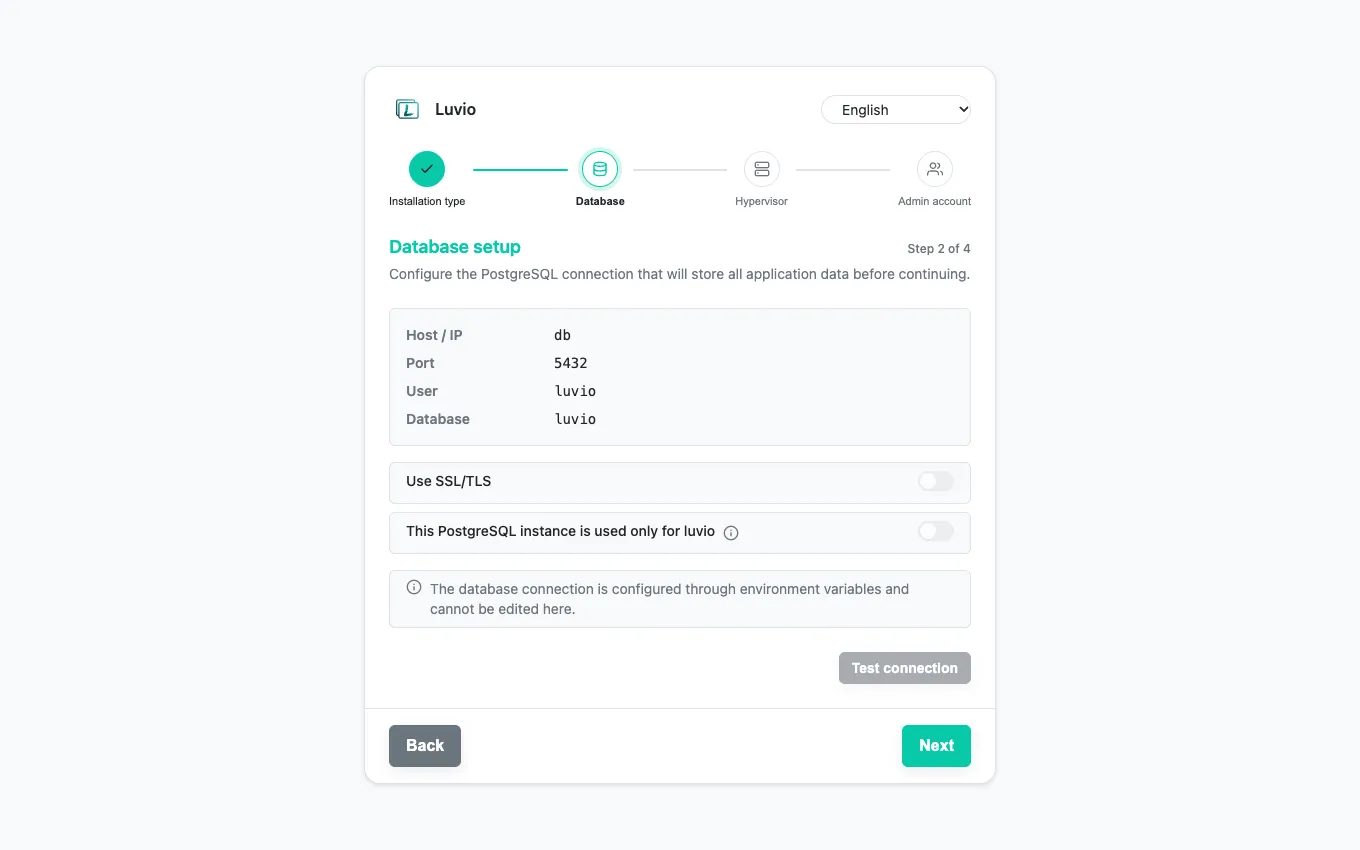
-
Your own PostgreSQL server: fill in Host / IP, Port, User, Password and Database (
luvio), click Test connection, then Next. Luvio creates the database and its tables. The account needs theCREATEDBright, unless the database exists already and belongs to it.
4. Connect the hypervisor
Section titled “4. Connect the hypervisor”Luvio creates and runs the virtual machines on your hypervisor. It supports Proxmox VE and VMware vSphere (vCenter Server 8.0 Update 1 or later).
This step is optional. Physical machines only: click Continue without a hypervisor. Your pools are then pools of existing machines, which you add by their IP address once the Luvio agent runs on them (Templates, agent and pools). You can add a hypervisor later in Administration > Hypervisors.
-
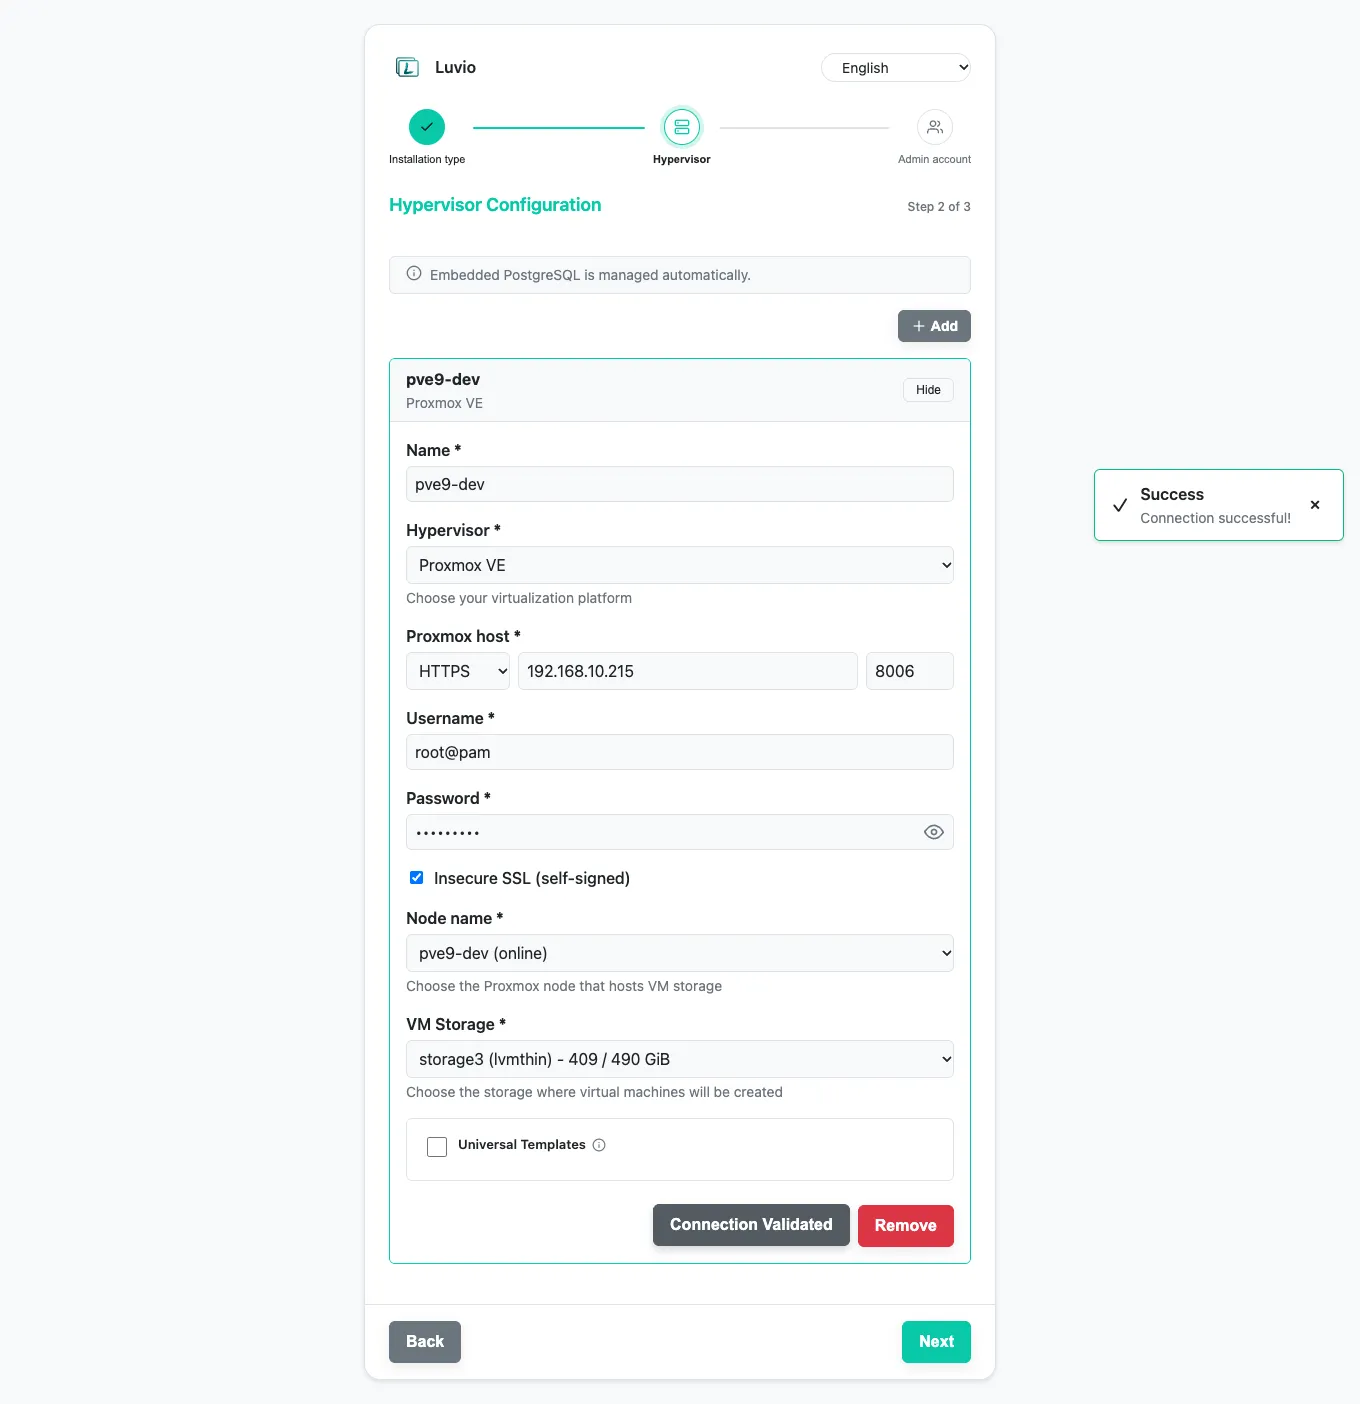
Click Add.
-
Give the connection a Name (for example the name of the cluster) and choose the Hypervisor.
-
Fill in the connection fields:
Proxmox VE
Field Value Protocol, Proxmox host, Port HTTPS, the address of a Proxmox node,8006Username root@pamPassword The password of rooton ProxmoxInsecure SSL (self-signed) Check it if Proxmox still uses the certificate it created at installation Use
root@pamwith its password: Proxmox allows some of the operations Luvio performs on virtual machines (CPU options, removing a stale lock) toroot@pamsigned in with a password only, not to other accounts or API tokens.VMware vSphere: the address of the vCenter Server (not of an ESXi host), port
443, a vCenter Single Sign-On account such asadministrator@vsphere.local, its password. The account, its privileges and the preparation of vCenter are described in the VMware vSphere setup guide. -
Click Test Connection. Luvio connects to the hypervisor and fills in the lists that follow: Node name for Proxmox, Datacenter, Cluster, Resource pool and VM folder for vSphere. When a list has a single choice, it is selected for you. When it has several, choose one and click Test Connection again. The button turns to Connection Validated.
-
Choose the VM Storage: the storage where Luvio creates the disks of the virtual machines.
-
Click Next. Luvio saves the connection.
If the test fails, see Troubleshooting.
5. Create the administrator account
Section titled “5. Create the administrator account”The administrator account is named admin. Type its Password twice (8 characters or more),
then click Save Admin.
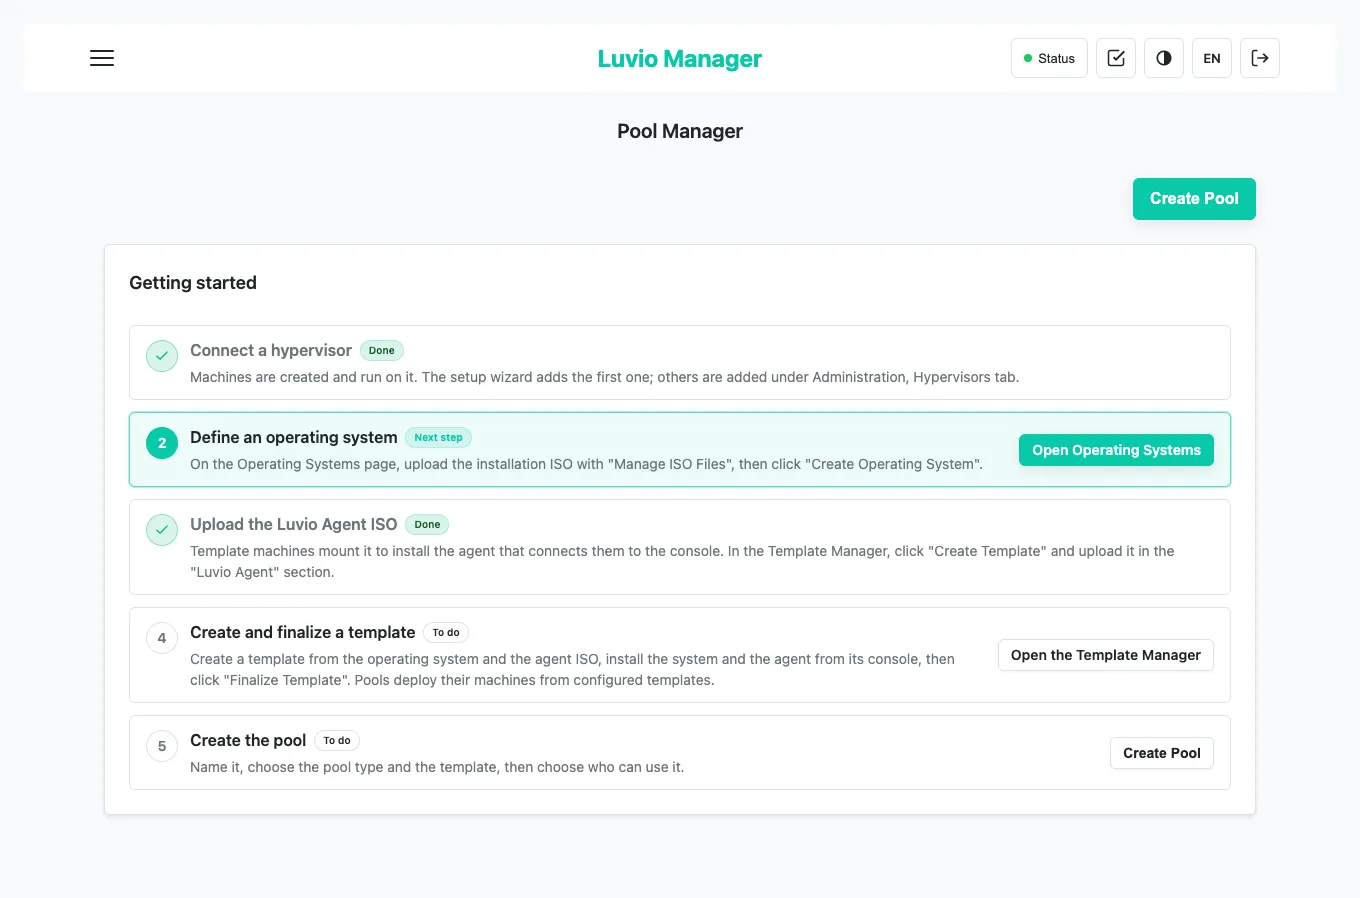
Luvio signs you in and opens the Pool Manager page. Its Getting started list shows the steps that remain before your users can connect.
Creating the administrator account completes the setup for good. With a configuration file, the setup is complete as soon as an administrator and a hypervisor exist, or an administrator alone when the file declares no hypervisor. The wizard does not open again, even if you later disable or delete every hypervisor: manage them in Administration > Hypervisors. To start over with an empty installation, delete Luvio’s data and install again, as the Uninstall section of your installation describes (.deb or .rpm, Docker, Kubernetes). With your own PostgreSQL server, drop Luvio’s database instead; except with the .deb or .rpm package, an administrator can also do it in Administration > Danger zone > Drop database. Either way every setting and account goes with it: the wizard never opens again over the data of an installation.
6. Check the server address
Section titled “6. Check the server address”The agents inside the virtual machines connect back to Luvio at the Server URL. Open the menu (top left), then Administration, tab Server & storage: Luvio Server Configuration shows it.
- You gave the address at installation:
LUVIO_PUBLIC_HOSTNAMEin the.envfile of Docker Compose,PUBLIC_HOSTNAMEfor the single container or in/etc/luvio/luvio.env, orserver.publicHostnamein the Helm values. The Server URL shows it with From environment: there is nothing to do here. To change it, change it where you set it. - You did not: the Server URL is the IP address Luvio finds on its own network interface. With
the Linux packages, it is usually the right one. If the virtual machines reach the server by
another name or address, click the pencil next to Server URL, type the DNS name or the IP
address (without
http://and without a port), then click the check mark.
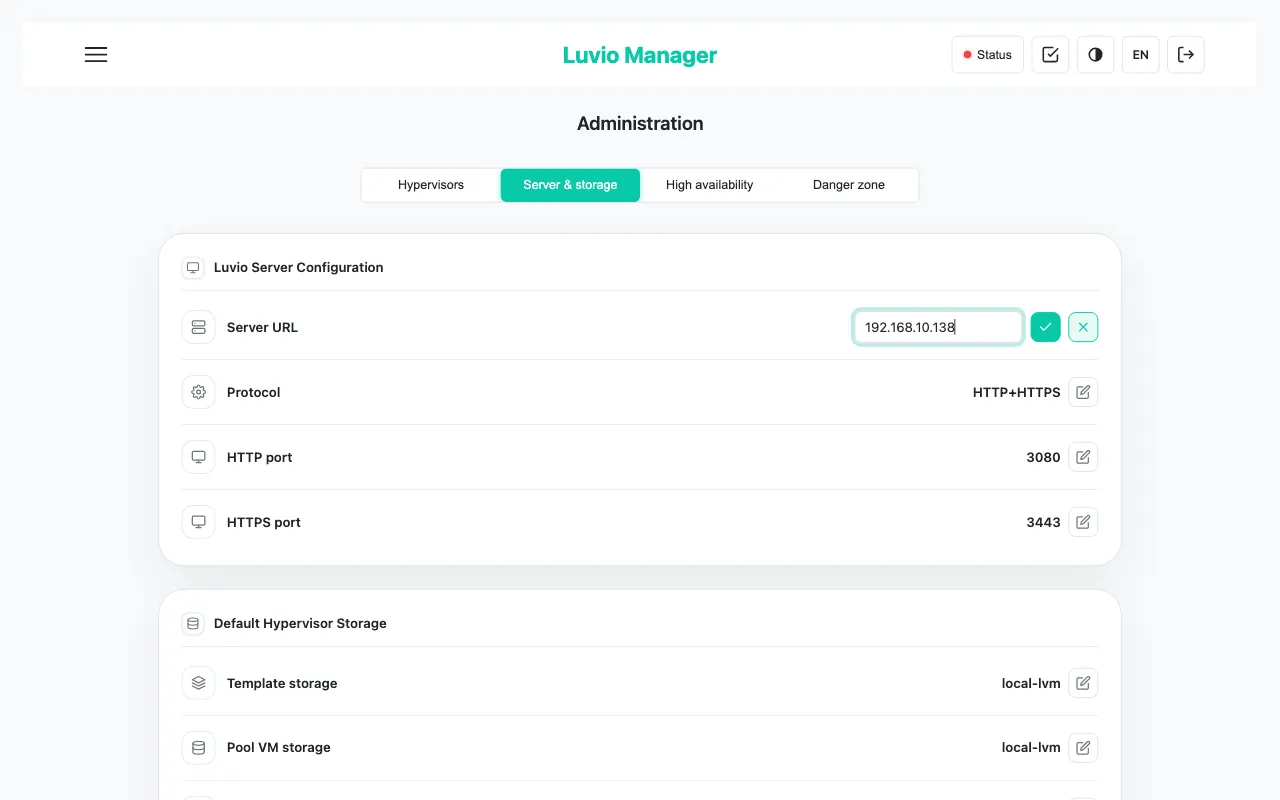
Protocol, HTTP port and HTTPS port are set here with the .deb or .rpm package
(Change the protocol or a port). With Docker and
Kubernetes they show From environment: the installation sets them, and publishes the ports.
Change them in the docker-compose.yml file or the Helm values; the label says where when you point
at it. A line set in /etc/luvio/luvio.env shows From environment too.
7. Create the user accounts
Section titled “7. Create the user accounts”Open the menu, then User Management, and click Create User:
-
Username and Password (8 characters or more, with at least a letter and a digit);
-
Role:
Role What the account can do userConnect to its desktops with the desktop client. It cannot sign in to the web console. managerAlso manage pools, machines and tasks in the web console: the machines of the pools, not the other VMs of the hypervisors. adminEverything, including templates, hypervisors, accounts and the VMs Luvio did not create (bringing one into a pool or a template).
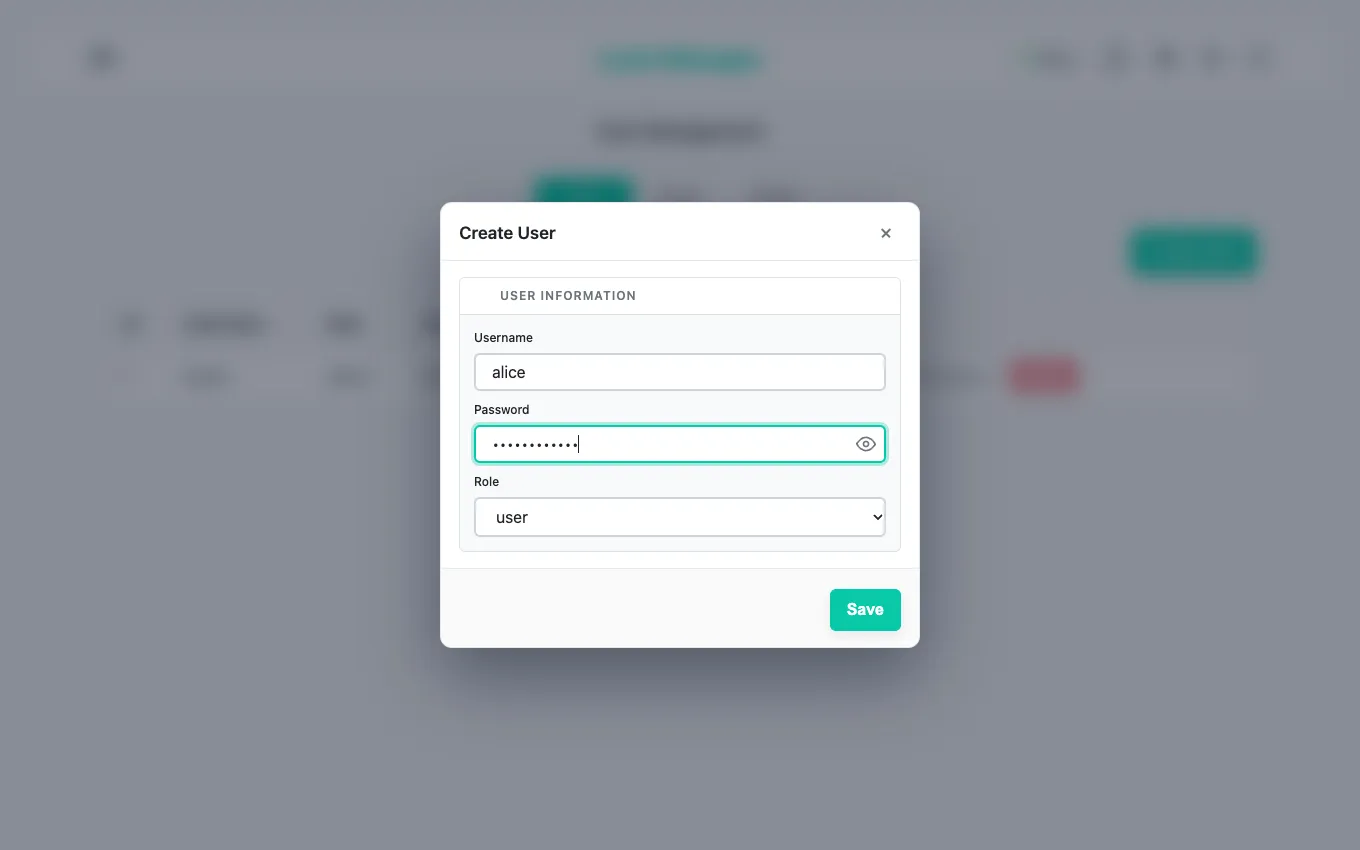
Give your users the user role. You grant them access to their desktops when you create the pool
(Templates, agent and pools).
Directories and single sign-on. In User Management > Settings > Authentication & Identity, Luvio connects to Active Directory, LDAP, OpenID Connect (Entra ID, Okta, Keycloak…) and SAML 2.0. See the authentication guides.
Next step
Section titled “Next step”Prepare the desktops: Templates, agent and pools.
Troubleshooting
Section titled “Troubleshooting”| Symptom | Cause and fix |
|---|---|
| The test says the TLS certificate is not trusted | The hypervisor uses a self-signed certificate: check Insecure SSL (self-signed). |
| The test fails with a timeout | The Luvio server does not reach the hypervisor: Proxmox listens on TCP 8006, vCenter on 443. Check the routes and firewalls between them. |
| “Select a value for …, then test the connection again.” | The hypervisor has several nodes or datacenters: choose one in the list and test again. |
| vSphere: “the VI/JSON API is unavailable” | vCenter is older than 8.0 Update 1, or the address is an ESXi host. |
| The wizard does not open, the browser shows the sign-in page | The setup was completed already. Sign in as admin. |